
Choosing the right smartphone can be overwhelming, and the camera is often a deciding factor. Understanding smartphone camera features is crucial for capturing stunning photos and videos. This article will delve into the essential features you should consider when evaluating a smartphone camera, from megapixels and aperture to optical zoom and night mode. Whether you’re a casual photographer or aspiring influencer, learning about these features will empower you to make informed decisions and maximize your smartphone’s photographic potential.
Beyond the basics of megapixels, navigating the world of smartphone camera features can feel like deciphering a complex code. Terms like aperture, optical zoom, image stabilization, and night mode are frequently used but not always fully understood. This guide will demystify these features, explaining their functions and how they impact image quality. By understanding these key components, you can confidently select a smartphone with a camera that meets your specific needs and helps you capture breathtaking moments with clarity and precision.
Different Types of Smartphone Cameras
Modern smartphones typically feature multiple camera lenses, each serving a distinct purpose. Understanding these different types is crucial for maximizing your photography potential.
Primary Camera
The primary camera, often called the wide-angle camera, is the most frequently used. It’s designed for general photography and typically boasts the highest resolution and largest sensor among the array of cameras.
Ultra-Wide Camera
Ultra-wide cameras offer a much wider field of view, ideal for capturing expansive landscapes or large groups of people. They emphasize perspective and create a dramatic sense of depth.
Telephoto Camera
Telephoto cameras provide optical zoom capabilities, allowing you to get closer to your subject without sacrificing image quality. These cameras are particularly useful for portraits and wildlife photography.
Macro Camera
Macro cameras are designed for extreme close-ups, revealing intricate details often invisible to the naked eye. They excel at capturing textures and small subjects like insects or flowers.
Depth Sensor
While not a camera in the traditional sense, a depth sensor assists in creating bokeh, the blurred background effect in portraits. It gathers information about the distance between the subject and the background, enabling the software to accurately apply the blur.
Night Mode Photography
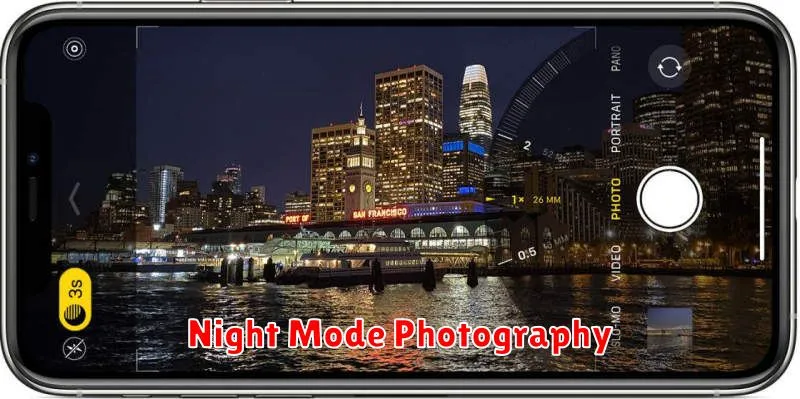
Night mode is a powerful feature designed to improve image quality in low-light conditions. It works by combining multiple exposures taken over a short period, effectively gathering more light than a single shot would allow. This process reduces noise and increases brightness, revealing details that would otherwise be lost in darkness.
Key improvements offered by night mode include reduced noise, improved dynamic range, and better color accuracy. The resulting images exhibit greater clarity and detail, even in challenging lighting situations.
While night mode is highly effective, it’s important to understand its limitations. Stability is crucial during the multi-second exposure process. Any movement, whether from the user or the subject, can result in blurring. A tripod or stable surface is highly recommended for optimal results. Additionally, night mode is generally most effective in static scenes, as moving subjects can appear ghostly or blurred due to the composite nature of the image capture.
HDR and When to Use It
HDR, or High Dynamic Range, is a camera feature that helps capture a wider range of light and detail in a scene. It works by taking multiple photos at different exposures and combining them to create a single image with improved highlights, midtones, and shadows.
Consider using HDR in situations with high contrast. This includes scenes with bright skies and dark foregrounds, or when photographing indoors near windows. HDR can help prevent blown-out highlights (overexposed bright areas) and crushed shadows (underexposed dark areas).
However, HDR isn’t always the best choice. Avoid using it for moving subjects, as the multiple exposures can lead to ghosting or blurring. It’s also generally not recommended for scenes where you want to preserve deep shadows or silhouettes, as HDR tends to brighten them.
Manual vs Automatic Settings
Modern smartphones offer a choice between automatic and manual camera settings. Automatic mode simplifies picture-taking by letting the software determine optimal settings like ISO, shutter speed, and white balance. This mode is ideal for quick snapshots and users unfamiliar with photography principles.
Manual mode, often denoted by a “Pro” label, grants control over these individual settings. This allows for greater creative freedom and fine-tuning to achieve specific effects. Manual mode is best suited for experienced users who understand how each setting impacts the final image.
| Feature | Automatic | Manual |
|---|---|---|
| ISO | Automatically adjusted | User defined |
| Shutter Speed | Automatically adjusted | User defined |
| White Balance | Automatically adjusted | User defined |
| Focus | Typically automatic | Can be manual |
Tips for Professional Photos
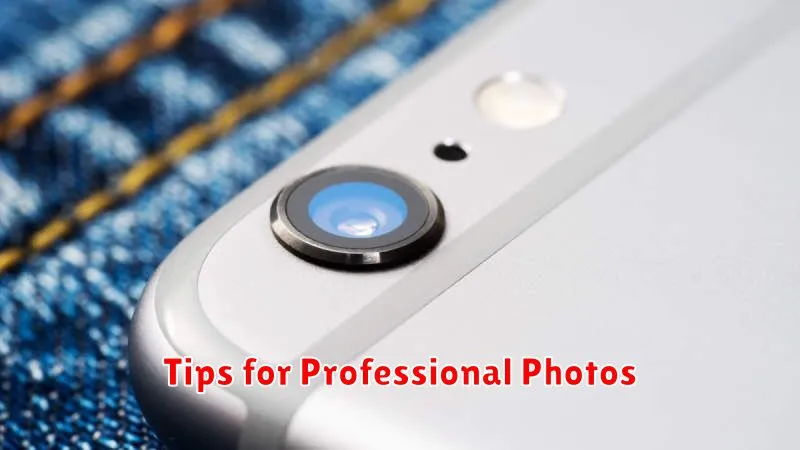
Taking professional-looking photos with your smartphone is achievable with a few key techniques. Consider these tips to elevate your photography:
Composition
Framing is crucial. Utilize the rule of thirds by imagining a grid over your screen and placing key elements along these lines or at their intersections. Leading lines naturally draw the viewer’s eye towards the subject, adding depth and interest. Experiment with different angles to create unique perspectives.
Lighting
Natural light is generally preferred. Avoid shooting directly into the sun, which can cause overexposure. In low-light conditions, consider using your phone’s night mode or finding a stable surface to avoid blurry images.
Post-Processing
Editing apps can enhance your photos. Adjust brightness, contrast, and saturation subtly for a polished look. Cropping can improve composition further.